สร้าง Cloud Infrastructure ด้วย OpenNebula ตอนที่ 3
-
Createdวันอังคาร, 21 ธันวาคม 2553
 สร้าง Cloud Infrastructure ด้วย OpenNebula มาถึงตอนที่ 3 แล้วหลังจากเราสร้าง Cluster ของ Private Cloud กันไปในตอนที่แล้ว ตอนนี้จะกล่าวถึงการสร้าง Services Image ให้กับ OpenNebula กันครับ OpenNebula ใช้เทคโนโลยีที่มีอยู่เข้ามาปรับใช้ได้อย่างลงตัว ไม่ว่าจะเป็นการใช้งาน Virtualization อย่าง Xen, KVM หรือ แม้กระทั่ง VMWare ผ่าน OpenNebula Driver การจัดการ Disk Image หรือ Service Image เราสามารถใช้ Image ได้หลากหลาย ไม่ว่าจะเป็น raw, qcow, qcow2, VirtualBox, หรือแม้กระทั่ง VMWare ได้เช่นกัน
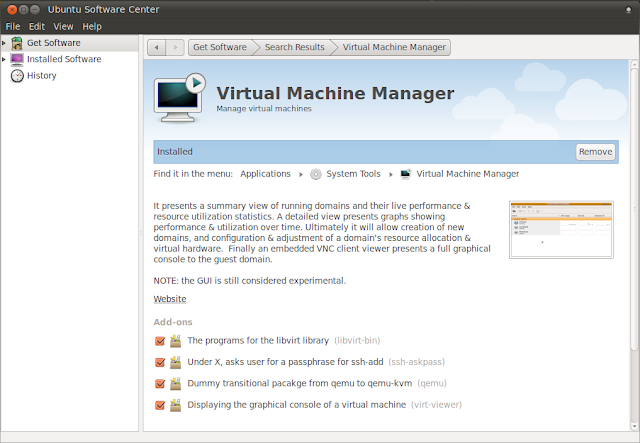
ในตอนนี้เรามาสร้าง Service Images ด้วยวิธีง่ายๆ ที่คุณหรือใครๆ ก็ทำได้ผ่านทางโปรแกรม GUI โดยไม่ต้องจิ้มคำสั่งกันแล้ว ผมพยายามหาวิธีง่ายๆ ให้น่ะครับ :) วิธีนี้คือการใช้ Virt-Manager ครับ ท่านที่ใช้ Ubuntu Desktop ก็สั่งติดตั้ง Virt-Manager ผ่านทาง Software Center กันได้เลย

เมื่อติดตั้งเสร็จแล้วก็สร้าง VM แล้วติด Linux อะไรก็ได้ลงไปก็ได้ ของผมเป็น Ubuntu Server เลือกติด OpenSSH Server ลงไปด้วยนะครับ

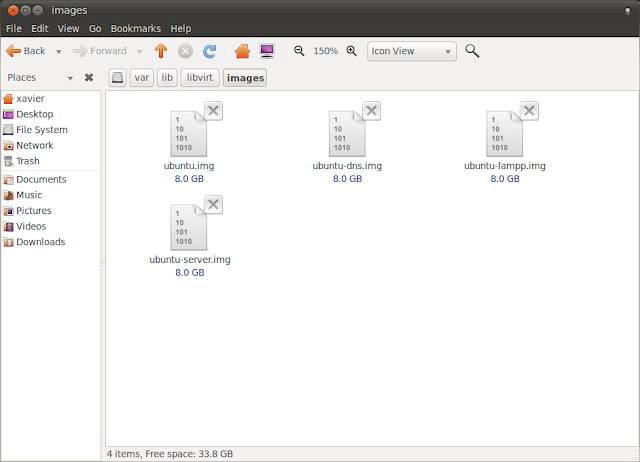
เมื่อติดตั้งเสร็จแล้ว ให้ Stop VM แล้วใช้ Nautilus เข้าไปที่ /var/lib/libvirt/images คุณจะเห็นรายชื่อ Image ที่คุณสร้าง VM ไว้

ให้คุณคัดลอก Image ที่ได้ไปไว้ที่เครื่อง Front End แล้วสร้าง VM Template
NAME = ubuntu-server
CPU = 1
MEMORY = 128
DISK = [
source = "/home/oneadmin/templates/ubuntu/ubuntu.img",
target = "sda",
readonly = "no" ]
NIC = [ NETWORK = "VM LAN" ]
FEATURES=[ acpi="no" ]
GRAPHICS = [
type = "vnc",
listen = "0.0.0.0",
port = "5903" ]
จากนั้นสั่ง Create VM กันได้เลย
oneadmin@frontend:~$ onevm create ubuntu.one
เมื่อสั่ง onevm list คุณจะพบว่า VM รันขึ้นมาแล้วครับ ;) ใช้ vncviewer เข้าไปดูได้เช่นเดิม การสร้าง Service Image นี้เป็นวิธีง่ายๆ แต่ OpenNebula สามารถสอดแทรกอะไรที่มากกว่านี้เข้าไปที่ Image ขณะ Boot ได้ เช่น ssh key, ตั้งค่า IP Address อัตโนมัติ หรือแม้กระทั่งสั่งติดตั้งโปรแกรมเพิ่มเติมคุณก็สามารถทำได้ วิธีนี้เราเรียกว่าการแทรก Context ตัว Context จะเป็น config ที่เพิ่มเข้าไปใน VM template แต่ context จะถูกสร้างเป็น Disk Image ขณะ Start VM และกำหนดเป็น Drive CDROM รอการใช้งาน เมื่อ VM Boot ขึ้นมาเราสามารถหยิบเอาของจาก Context มาใช้ได้ผ่าน script ใน rc ขณะ boot ได้ เราเรียกว่า rc.context สำหรับ ท่านที่คุ้นเคยกับ Linux อยู่แล้ว คุณอาจจับ script context นี้ ใส่ลงใน rc.local ได้เลย มาแก้ไข VM template ของเรากันก่อนครับ เพิ่มส่วน context ลงไปดังนี้
CONTEXT = [
hostname = "$NAME",
ip_private = "$NIC[IP, NETWORK=\"VM LAN\"]",
ip_public = "192.168.2.210",
files = "/home/oneadmin/templates/ubuntu/init.sh /home/oneadmin/templates/ubuntu/id_dsa.pub",
target = "sdc",
root_pubkey = "id_dsa.pub",
username = "ubuntu",
user_pubkey = "id_dsa.pub"
]
เขียน script สำหรับ init.sh ดังนี้
#!/bin/bash
if [ -f /mnt/context/context.sh ]
then
./mnt/context/context.sh
fi
if [ -n "$HOSTNAME" ]; then
echo $HOSTNAME > /etc/hostname
hostname $HOSTNAME
fi
if [ -n "$IP_PRIVATE" ]; then
ifconfig eth0 $IP_PRIVATE
fi
if [ -n "$IP_PUBLIC" ]; then
ifconfig eth0:1 $IP_PUBLIC
fi
if [ -n "$NETMASK" ]; then
ifconfig eth0 netmask $NETMASK
fi
if [ -f /mnt/context/$ROOT_PUBKEY ]; then
cat /mnt/context/$ROOT_PUBKEY >> /root/.ssh/authorized_keys
fi
if [ -n "$USERNAME" ]; then
useradd --create-home --shell /bin/bash --group admin $USERNAME
if [ -f /mnt/context/$USER_PUBKEY ]; then
mkdir -p /home/$USERNAME/.ssh/
cat /mnt/context/$USER_PUBKEY >> /home/$USERNAME/.ssh/authorized_keys
chown -R $USERNAME /home/$USERNAME/.ssh
chmod -R 600 /home/$USERNAME/.ssh
fi
fi
แล้วเอา script context ใส่ลงใน rc.local ของ Service Image ครับ
#!/bin/sh -e
mount -t iso9660 /dev/sdc /mnt
if [ -f /mnt/context.sh ]; then
./mnt/init.sh
fi
umount /mnt
exit 0
จากนั้นก็ลอง Create VM กันอีกรอบ เมื่อ VM เข้าสถานะ running แล้วให้ใช้ ssh remote เข้าไปดูครับ ถ้านึกไม่ออกว่า VM ได้ IP Address อะไรใช้คำสั่ง one show หัวใจสำคัญอยู่ที่ init.sh ว่าเราจะให้ VM สร้างอะไรที่แตกต่าง อยากได้อะไรก็ใส่เข้าไปได้เลยครับ การเพิ่ม Context ดีกว่าสร้าง VM Image ขึ้นมาทึ่มๆ จริงมั๊ยครับ ;)
ที่มา : http://www.thaiopensource.org//howto/สร้าง-cloud-infrastructure-ด้วย-opennebula-ตอนที่-3
Who's Online
มี 2068 ผู้มาเยือน และ ไม่มีสมาชิกออนไลน์ ออนไลน์


